
Home Assistant Remote Access Without Nabu Casa: 5 Free Ways
Access Home Assistant remotely without Nabu Casa. Free, secure methods compared: Tailscale, Cloudflare Tunnel, WireGuard, and DuckDNS, plus which to pick.

Researched with AI assistance, reviewed and edited by Tapabrata Biswas.

In this article
- 01What remote access without Nabu Casa actually means
- 02What you give up when you skip Nabu Casa
- 03The free methods compared
- 04Tailscale: the easiest free method
- 05Cloudflare Tunnel: a public address without opening ports
- 06WireGuard: a self-hosted VPN with nothing in the cloud
- 07DuckDNS and Let's Encrypt: the classic route, and its catch
- 08Nginx Proxy Manager: the advanced reverse proxy
- 09ZeroTier and Twingate: two more private options
- 10Which method should you pick?
- 11Is it safe to expose Home Assistant to the internet?
- 12What this post does not cover
- 13Sources
Home Assistant Cloud costs $6.50 a month or $65 a year, and you can reach your smart home from anywhere without paying a cent of it. Nabu Casa, the company behind Home Assistant, makes remote access effortless, and that fee funds the project. But several free methods do the same job, and the best of them are arguably safer than what most people cobble together when they set out to save the money.
This guide compares the free and self-hosted ways to reach Home Assistant from outside your house: VPN tools like Tailscale and WireGuard, Cloudflare Tunnel, and the classic DuckDNS-plus-port-forwarding route. The picks and warnings here come from Home Assistant's own documentation, each tool's docs, and community consensus, not from us testing every option in a lab. Check one thing before you start: if your internet provider puts you behind CG-NAT (carrier-grade NAT, common on mobile broadband and some fibre plans), any method that opens a router port will fail, and you'll want Tailscale or Cloudflare Tunnel instead.
What remote access without Nabu Casa actually means
Remote access means reaching your Home Assistant dashboard from outside your home network, over the internet, instead of only while you're on your home Wi-Fi. Home Assistant is local-only by default, on purpose, so getting to it from the road always takes one extra piece.
There are two families of methods, and which one you pick decides how safe your setup is. The first is a private tunnel or VPN: Tailscale, WireGuard, ZeroTier, or Cloudflare Tunnel. These connect your phone to your home without putting Home Assistant on the open internet, so a stranger can't even find it. The second is port forwarding: you open a door in your router (usually paired with DuckDNS for a free web address) so the Home Assistant login page answers at a public URL. It works, but it puts your login screen somewhere anyone can knock.
That one choice matters more than any feature in the list below.
What you give up when you skip Nabu Casa
Nabu Casa Home Assistant Cloud is the paid remote-access service run by the project's own company, and it does two things the free methods struggle to match. It's worth naming them so you skip it with your eyes open.
The price is $6.50 a month or $65 a year in the US (about €7.50 or £6.50 elsewhere), with a 31-day free trial, and the fee directly funds Home Assistant development. For that you get remote access with nothing exposed and no configuration, plus two extras: cloud voice control through Amazon Alexa and Google Assistant, and the cloud text-to-speech and speech-to-text engines that power Assist.
The free routes have one honest catch. The VPN methods keep Home Assistant private, which is exactly why they can't hand your commands to Amazon's or Google's cloud: there's no public endpoint for those services to call. If Alexa or Google Assistant voice control is the reason you want remote access, Nabu Casa (or a public method like Cloudflare Tunnel) is the real answer, and no VPN will get you there. For everything else, the free routes are genuinely fine.
The free methods compared
For most people the best free option is Tailscale: no port forwarding, Home Assistant stays off the public internet, and it installs as an official add-on. The table lays out how the alternatives trade off, with Nabu Casa left in as the paid benchmark.
| Method | Needs port forwarding? | Exposes HA publicly? | Cost | Difficulty | Best for |
|---|---|---|---|---|---|
| Nabu Casa Cloud (paid benchmark) | No | No | $6.50/mo or $65/yr | Very easy | Zero setup, plus Alexa and Google voice |
| Tailscale | No | No, private tailnet | Free (6 users, unlimited devices) | Easy | Most people who want free and safe |
| Cloudflare Tunnel | No | Yes, a Cloudflare hostname | Free (needs a domain on Cloudflare) | Moderate | A public HTTPS address, no open ports |
| WireGuard (self-hosted) | Yes, one UDP port | No, VPN only | Free | Moderate | Self-hosters who want nothing in the cloud |
| DuckDNS + Let's Encrypt | Yes, TCP 443 | Yes, the HA login page | Free | Moderate | The classic DIY route, if you harden it |
| Nginx Proxy Manager | Yes, TCP 80/443 | Yes, via the proxy | Free, plus a domain | Advanced | A homelab already running several services |
| ZeroTier / Twingate | No | No, VPN only | Free tiers (smaller than Tailscale) | Easy to moderate | Backup VPN picks if Tailscale doesn't fit |
Needs port forwarding?
- Nabu Casa Cloud (paid benchmark)
- No
- Tailscale
- No
- Cloudflare Tunnel
- No
- WireGuard (self-hosted)
- Yes, one UDP port
- DuckDNS + Let's Encrypt
- Yes, TCP 443
- Nginx Proxy Manager
- Yes, TCP 80/443
- ZeroTier / Twingate
- No
Exposes HA publicly?
- Nabu Casa Cloud (paid benchmark)
- No
- Tailscale
- No, private tailnet
- Cloudflare Tunnel
- Yes, a Cloudflare hostname
- WireGuard (self-hosted)
- No, VPN only
- DuckDNS + Let's Encrypt
- Yes, the HA login page
- Nginx Proxy Manager
- Yes, via the proxy
- ZeroTier / Twingate
- No, VPN only
Cost
- Nabu Casa Cloud (paid benchmark)
- $6.50/mo or $65/yr
- Tailscale
- Free (6 users, unlimited devices)
- Cloudflare Tunnel
- Free (needs a domain on Cloudflare)
- WireGuard (self-hosted)
- Free
- DuckDNS + Let's Encrypt
- Free
- Nginx Proxy Manager
- Free, plus a domain
- ZeroTier / Twingate
- Free tiers (smaller than Tailscale)
Difficulty
- Nabu Casa Cloud (paid benchmark)
- Very easy
- Tailscale
- Easy
- Cloudflare Tunnel
- Moderate
- WireGuard (self-hosted)
- Moderate
- DuckDNS + Let's Encrypt
- Moderate
- Nginx Proxy Manager
- Advanced
- ZeroTier / Twingate
- Easy to moderate
Best for
- Nabu Casa Cloud (paid benchmark)
- Zero setup, plus Alexa and Google voice
- Tailscale
- Most people who want free and safe
- Cloudflare Tunnel
- A public HTTPS address, no open ports
- WireGuard (self-hosted)
- Self-hosters who want nothing in the cloud
- DuckDNS + Let's Encrypt
- The classic DIY route, if you harden it
- Nginx Proxy Manager
- A homelab already running several services
- ZeroTier / Twingate
- Backup VPN picks if Tailscale doesn't fit
One note the table can't hold: the Companion app works with all of these. You either point its external URL at your new address, or connect a VPN client on the phone first and let the app ride the tunnel.
Tailscale: the easiest free method
Tailscale is a VPN built on WireGuard that links your devices into a private network called a tailnet, with no ports to open. Your Home Assistant box, your phone, and your laptop each join the tailnet and get a stable private address, and they talk to each other over an encrypted connection that no one outside can see.
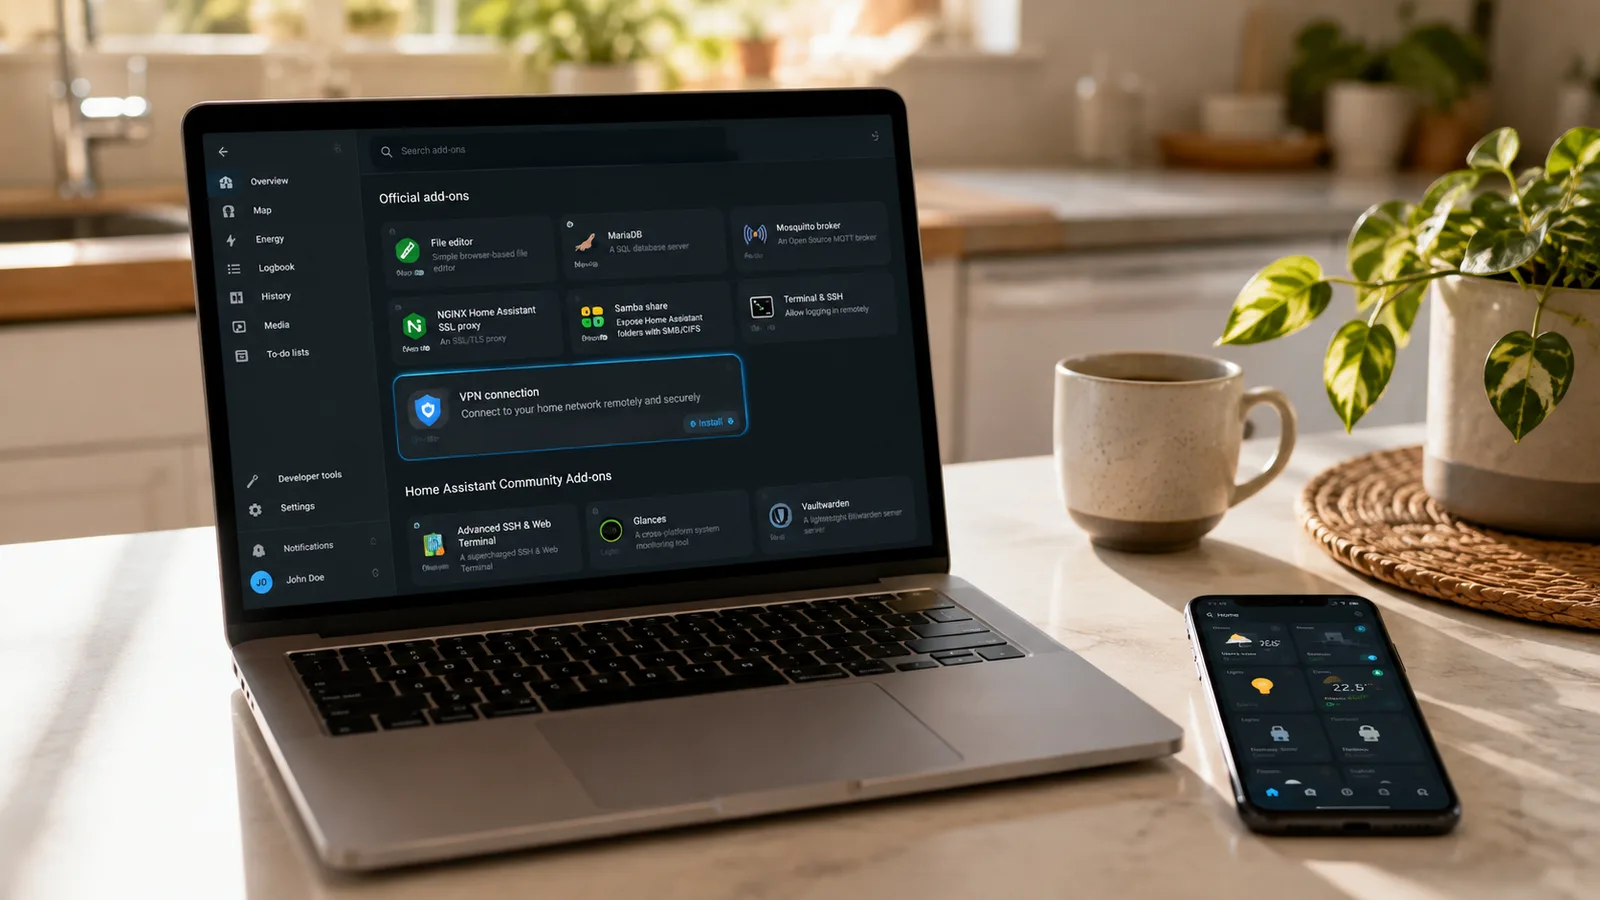
Setup runs through the official add-on. Install the Tailscale app from Settings, then Apps (older guides say Add-ons; Home Assistant renamed Add-ons to Apps in the 2026.2 release in February 2026, though nothing changed underneath). Start it, authenticate to join your tailnet, then turn on MagicDNS and HTTPS so you get a clean name like homeassistant.your-tailnet.ts.net. Use the Tailscale Serve feature to reach Home Assistant, and leave Funnel off, because Funnel would push your instance onto the public internet and undo the whole point. You'll also add trusted_proxies and use_x_forwarded_for to configuration.yaml.
The free tier got better in 2026. Since Tailscale's April 2026 pricing change, the free Personal plan covers up to 6 users and unlimited of your own devices, up from the old 3 users and 100 devices. For a household, that's effectively free forever. On your phone you install the Tailscale client, and the Companion app then reaches Home Assistant over the tailnet. This is the method to try first.
Cloudflare Tunnel: a public address without opening ports
Cloudflare Tunnel is a free service that publishes Home Assistant at a web address through Cloudflare's network, without opening any port on your router. A small cloudflared program runs beside Home Assistant and dials outward to Cloudflare, so visitors reach your instance through a Cloudflare hostname and your home IP address stays hidden.
The important difference from a VPN: this one does put Home Assistant on the public internet. Anyone with the URL lands on your login page (behind Cloudflare's proxy and real HTTPS, but reachable). So the setup isn't finished until you add Cloudflare Access, part of Cloudflare's free Zero Trust tier, which drops an authentication screen in front of Home Assistant before anyone reaches the login.
You'll need a domain whose DNS is managed by Cloudflare. The free Cloudflare plan is enough, and a domain runs a few dollars a year if you don't own one already. Install the community cloudflared add-on, connect it to your Cloudflare account, and bind a hostname to Home Assistant. Because the connection is outbound only, this works behind CG-NAT, which makes it the natural partner to Tailscale for anyone whose ISP blocks port forwarding.
WireGuard: a self-hosted VPN with nothing in the cloud
WireGuard is a fast, modern VPN you run yourself, so your phone joins your home network directly with no third-party service in the middle. It's the same technology Tailscale automates, except here you set it up and hold all the keys.
You forward exactly one UDP port (51820) to the Home Assistant box, and only that port. You never forward 8123 or the Home Assistant UI, so the dashboard stays invisible from outside; the only thing facing the internet is an encrypted VPN endpoint. Install the WireGuard community add-on, set its host to your external address (a DuckDNS name works if your home IP changes), define a named peer for each device, forward UDP 51820 on the router, and import the config or QR code into the WireGuard mobile app.
Two caveats. It's more hands-on than Tailscale, and it needs that inbound port, so it fails behind CG-NAT. If you want a fully self-hosted VPN and your ISP gives you a reachable IP, this is the cleanest choice.
DuckDNS and Let's Encrypt: the classic route, and its catch
DuckDNS with Let's Encrypt is the long-standing free method: a free web address that tracks your changing home IP, an automatic TLS certificate, and a forwarded port so Home Assistant answers at https://yourname.duckdns.org. The DuckDNS add-on handles the dynamic DNS and the certificate together, which is why so many older tutorials reach for it.
The catch is real. This is the one method that puts your Home Assistant login page directly on the public internet. The official docs are blunt about the risk: "Just putting a port up is not secure." You forward TCP 443 (modern setups no longer need port 80), and from that moment your login screen is a public target. If you go this way, TLS is not optional, a strong unique password and two-factor authentication are essential, and IP banning plus prompt updates are the difference between fine and compromised.
It still works, it's well documented, and it's free. But the community increasingly treats plain DuckDNS port forwarding as the route to avoid when a VPN or tunnel does the same job without exposing anything. Like WireGuard, it also fails behind CG-NAT.
Nginx Proxy Manager: the advanced reverse proxy
A reverse proxy sits in front of Home Assistant, handles the HTTPS certificate, and routes your domain to Home Assistant's internal address, and Nginx Proxy Manager is a friendly add-on that manages all of that through a web UI. It's most useful when you already run several home services and want them all behind one domain with proper certificates.
You forward TCP 80 and 443 to the proxy, so like DuckDNS this exposes Home Assistant (through the proxy) to the public internet, and the same hardening applies. The upside is control: you can add access lists, basic auth, geo or IP blocking, or put Cloudflare in front. Home Assistant also needs trusted_proxies and use_x_forwarded_for set in configuration.yaml, or it will reject the proxied connection outright.
This is the advanced pick with the most moving parts. If you're not already running a homelab, one of the VPN methods will get you there with far less to maintain.
ZeroTier and Twingate: two more private options
ZeroTier and Twingate are two more VPN-style tools that, like Tailscale, keep Home Assistant off the public internet with no port forwarding. Both have community Home Assistant add-ons, and both are worth knowing if Tailscale doesn't suit your setup.
ZeroTier is a peer-to-peer mesh network, similar in spirit to Tailscale. Its free tier tightened in 2026 to roughly 10 devices and one network, so it's more limited than Tailscale for a busy household. Twingate takes a zero-trust, per-resource approach rather than joining you to a whole network; its add-on runs on Home Assistant OS, and the free plan covers up to 5 users. Either works well, but for most people Tailscale's larger free tier makes it the first choice and these two the backups.
Which method should you pick?
Pick by your top priority, not by whichever guide you read first:
- Free and you'd rather not think hard about security: Tailscale.
- You want Alexa or Google voice control: Nabu Casa, or Cloudflare Tunnel with Access in front (VPN-only methods can't do cloud voice).
- You want a public address to share a dashboard: Cloudflare Tunnel, locked down with Cloudflare Access.
- You want nothing in the cloud at all: WireGuard.
- You already run a homelab with a domain: Nginx Proxy Manager.
- You're behind CG-NAT: Tailscale or Cloudflare Tunnel, because the port-forwarding methods can't reach you.
If you're still setting things up, our Home Assistant setup guide covers the basics first, and it's worth getting the local install solid before you open any door to the outside world.
Is it safe to expose Home Assistant to the internet?
Exposing the Home Assistant login page directly to the internet is risky, which is exactly why the safest free methods never do it. Home Assistant's own documentation ranks the options in order of safety: cloud (Nabu Casa) first, then a VPN, then a reverse proxy, then plain port forwarding last.
The threat is not hypothetical. Home Assistant runs on port 8123, a well-known fingerprint, so internet-wide scanners routinely probe for exposed instances, and a login page with a weak password or no TLS is a soft target. VPN and tunnel methods (Tailscale, WireGuard, ZeroTier, Twingate) mean a scanner can't even see your dashboard, because there's nothing listening on a public port. That invisibility is the whole security advantage.
If you do port-forward, treat Home Assistant's securing checklist as mandatory, not optional: enforce TLS, set a strong unique password, turn on two-factor authentication, enable IP banning, and keep the software current. And if the whole of Home Assistant stops responding once you're away, that's a local-stability problem to fix before you blame the remote setup. Once access is solid, it's worth taking the time to build a dashboard worth checking from your phone.
What this post does not cover
This is a comparison of the free ways in, not a screenshot-by-screenshot tutorial for each one, so the deep setup steps live in the official docs and each add-on's page (linked in Sources). It also doesn't cover setting up Nabu Casa itself, since this is the alternatives guide, nor remote desktop or SSH access to the host operating system, nor exposing other home services beyond Home Assistant. The security notes here are educational; if you expose anything to the internet, follow Home Assistant's own securing checklist for your specific setup.
Sources
Frequently asked questions

Written by
Tapabrata Biswas
Tech Researcher
I test AI productivity tools and research home-automation gear the way most people use them. Not in a lab, but on an ordinary desk with an ordinary internet connection. The only test that matters: does it save you time?
Share the Post with Your Besties
Get the plain-English tech brief
One email a week on AI tools and smart-home tech. No jargon, no hype.